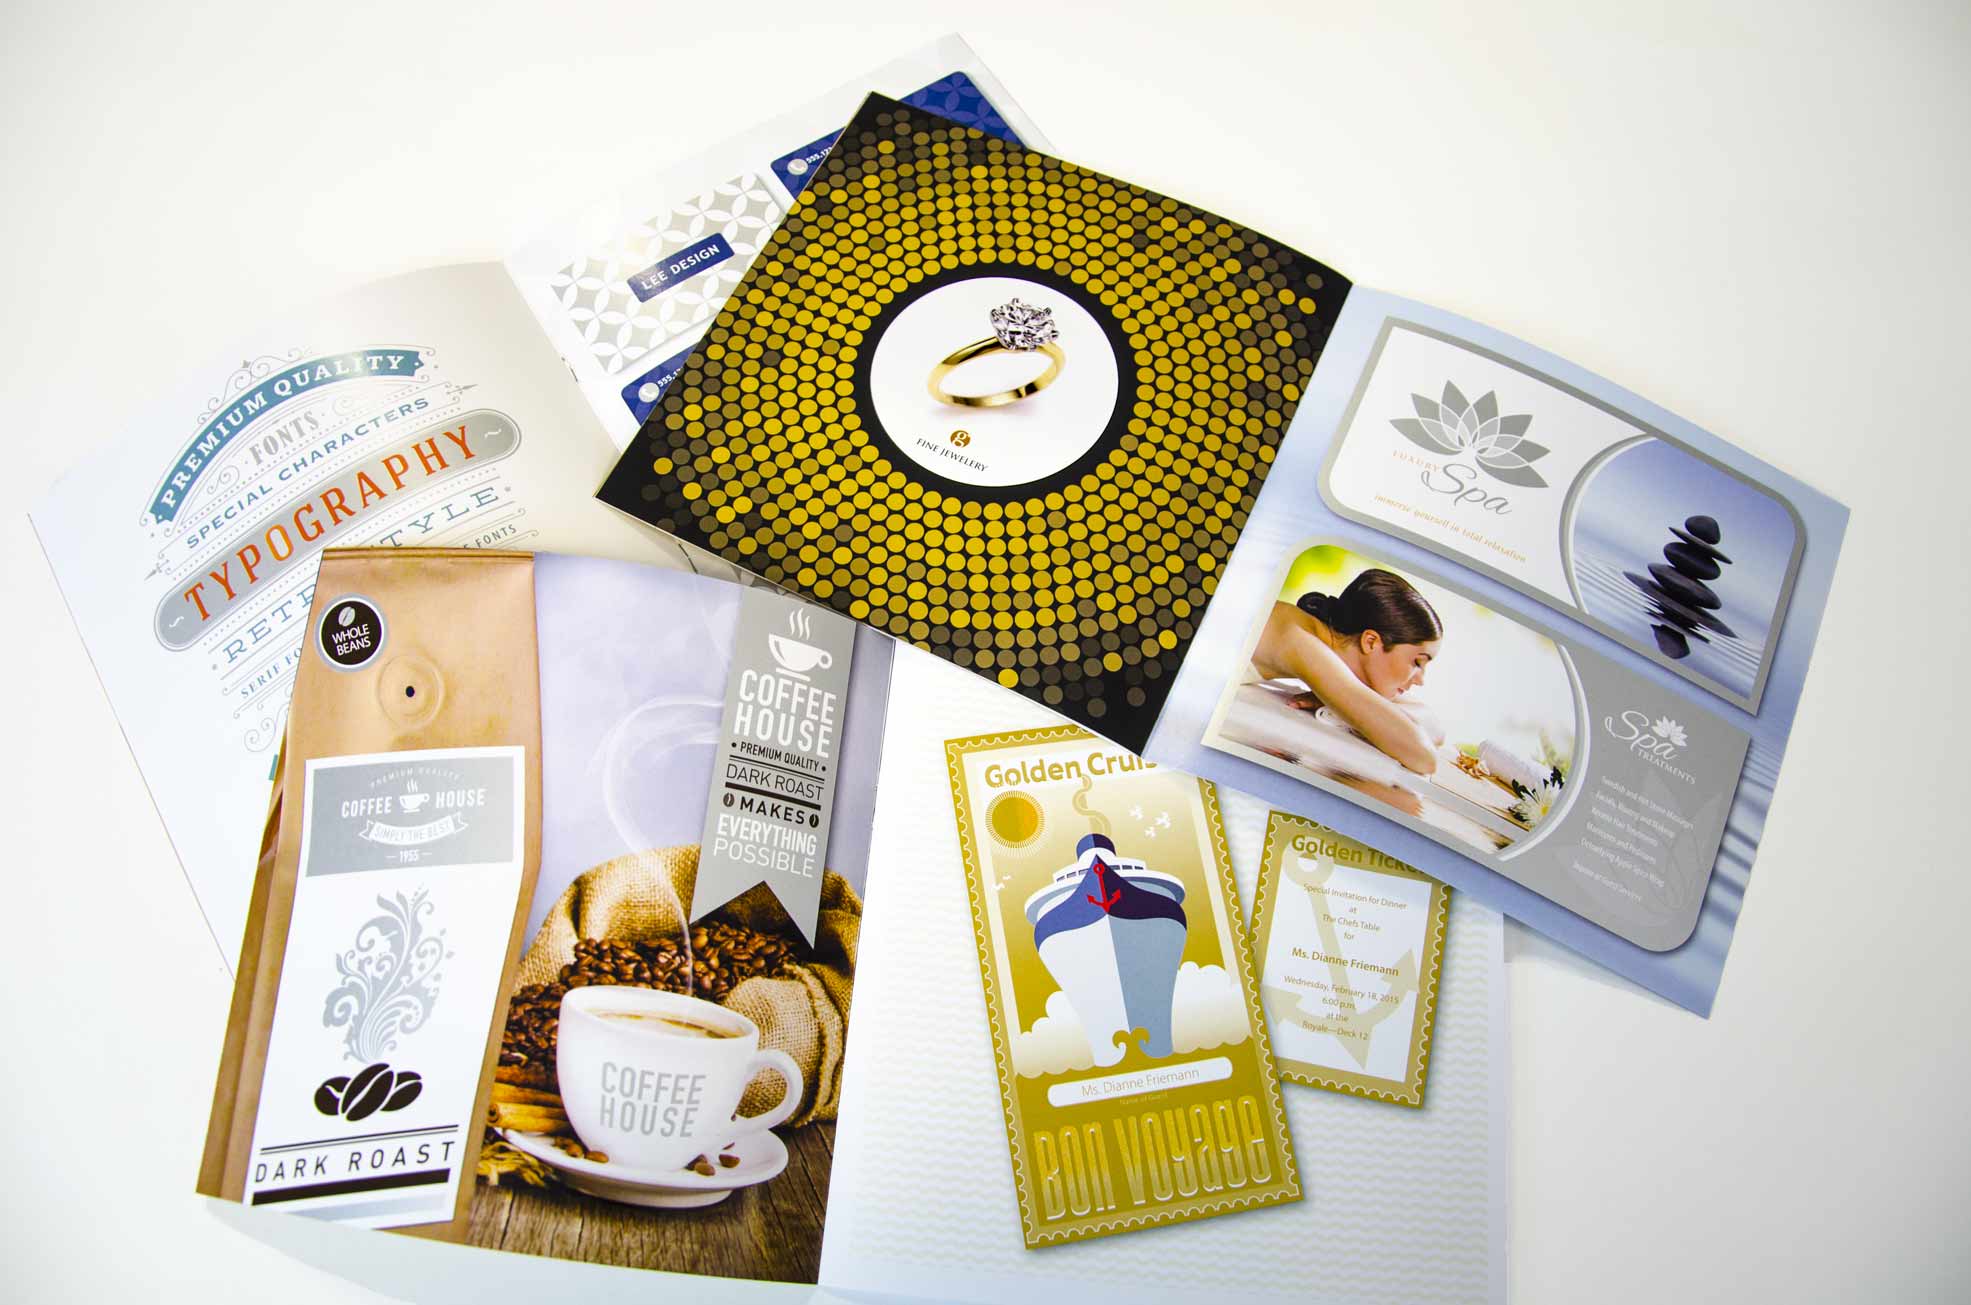
How About Adding Some BLING To Your Brand?
In this blog post, we’ll walk you through step by step on how to use silver or gold metallic dry Ink in your Adobe Illustrator design.
Not only can you draw vector shapes and fill them with 100% silver or gold metallic dry ink, but you can use opacity through the Transparency Panel to add depth and interest by overlaying metallic ink onto shapes underneath.
Play with different percentages of silver or gold opacity on top of non-metallic colors to see different results. Although it’s difficult to visualize the final product on a screen, printing samples based on a variation of transparency will help you choose.
Think about your next print project and how you can add some BLING to your brand. Consider this:
- A glint of silver or gold helps draw a prospect’s eye to your brand message.
- Metallic inks give your piece a sense of quality and luxury for a high-end look.
- Direct mail pieces stand out from the rest with eye-catching headlines and sparkling variable content.
- Certificates and awards emanate a sense of higher prestige and importance.
- Metallic overlays add brilliant dimension to product images, setting you apart from competitors.
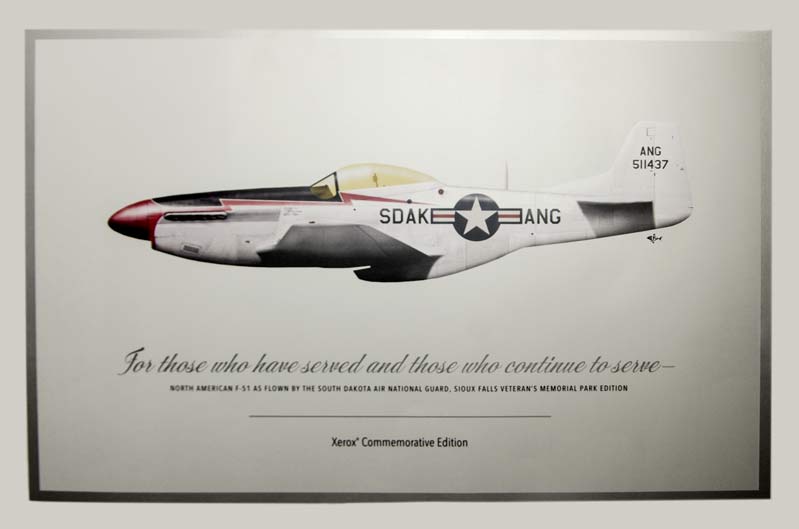
Step 1:
These instructions assume that you’ve already created a design in which you’ll overlay your silver or gold metallic dry ink color.
- Open your design file.
- Set-up a new layer and name it silver or gold. This will be your metallic layer.
- Set-up your metallic color. Note the instructions here are slightly different than in the previous video.
- Select Window > Swatches > Color Libraries > Color Books > Pantone Metallic Coated. When the window comes up, search on 871 (for gold) or 877 (for silver). Add either color to your Swatches Panel. Once added, double click on the color and change the mode from Book Color to CMYK, change the name from Pantone to either Silver or Gold. Make sure the Color Type Spot Color is selected.

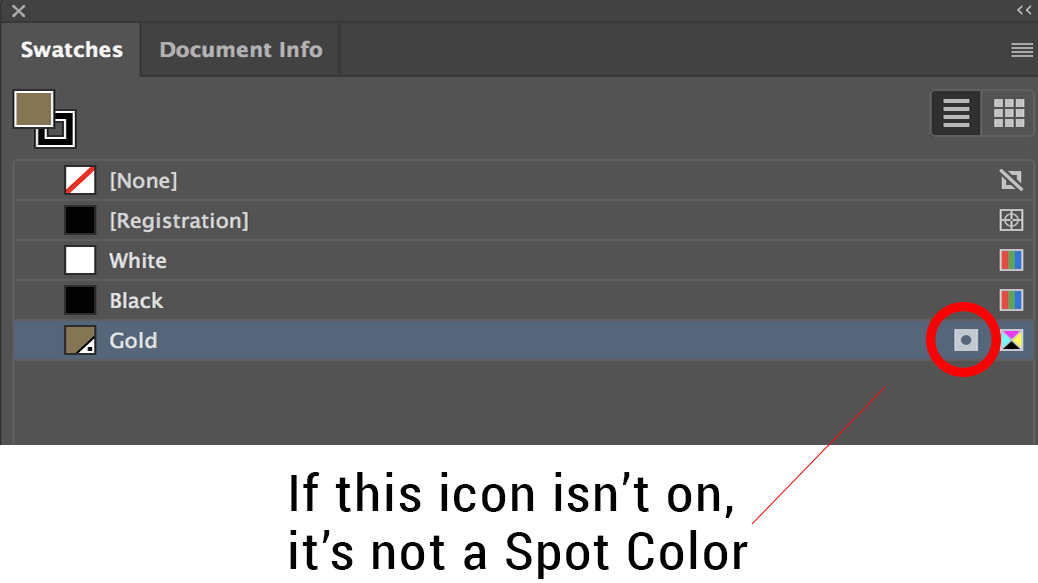
- When renaming your colors, it’s extremely important that you use capital letters for S & G. The name should either be Silver or Gold…no other letters or words. Also, use either silver or gold in your design.
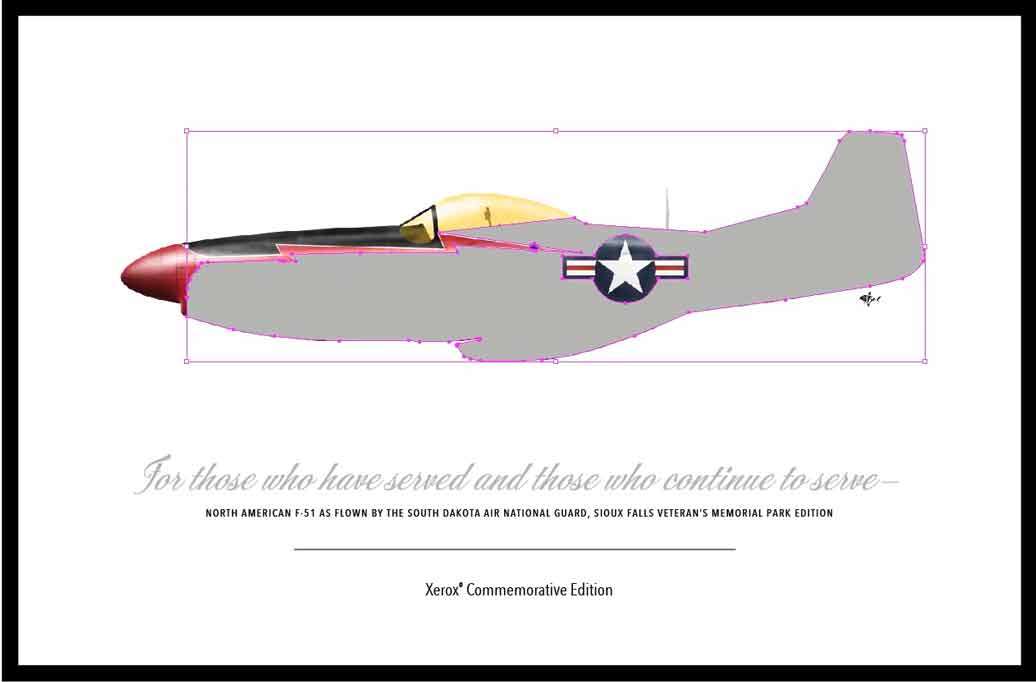
- While in the metallic layer, use the pen tool or another tool to draw a shape over the area in which you want to apply the silver or gold color. In the video example, you’ll see that the base shape has both type and texture which will show through.
- Fill your shape with the new spot metallic color swatch.
Step 2:
- While your object is still selected, go to Window > Transparency > Opacity > Select the opacity you want.
- Change Normal to Multiply.
- From there, you can play with the amount of opacity you want in your design.
- Keep in mind, the closer to 100% opacity you have, you’ll see a heavier silver or gold effect.
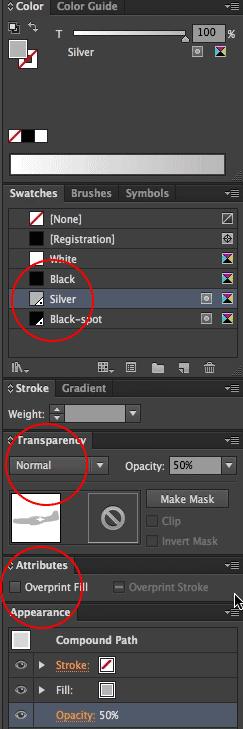
Step 3:
- With the shape still selected, go to Window > Attributes > and check Overprint Fill.
- This is extremely important, if you don’t do this, the color below will be knocked out and you won’t get the multiply effect you want.
- To create a more dramatic effect with silver on type, you can create your bottom type layer using black or a percentage of black.
- Copy the bottom type layer and paste it in place.
- While the top layer is still highlighted, choose the Silver or Gold color from the Swatches Panel.
- Then use the same process as before go to Window > Transparency > Select your percentage > change Normal to Multiply.
- In the attributes menu, select Overprint Fill. You can also set Overprint Stroke or both, depending on your design.
- After you set overprinting options, you should use the Overprint Preview Mode (View > Overprint Preview) to see an approximation of how the overprinting colors will print.
- As you’re working, you can keep organized by placing your silver or gold objects/text on your metallic layer.
Now all you need to do is set-up your InDesign file and import your artwork. The spot color will come right in when you place the file. Note that you won’t be able to change the name of the spot color in InDesign once it’s imported. If you don’t name it properly, you’ll have to go back into the original Illustrator file to change it.
Refer back to the Part 1 video on how to export your PDF from InDesign.
Of course, we’re here to help and collaborate with you on your design. Our #1 job is to make your job easier. RELAX…we got this.
Stop by next month to read Part 3 of our three part series to help you BRING ON THE BLING and stand out from your competition.
Visit our DIGITAL & OFFSET Services page to learn more about what we produce and what our clients say about us!
Want to see what silver or gold metallic dry ink looks like on paper? Get your FREE Print To Impress Sample Collection here.
