There are many highly technical articles written about DPI vs PPI explaining resolution, pixels, and resampling/resizing images. Some are difficult to wrap your head around. That’s why we’ve developed this simple guidance to help you understand the correct DPI for print. For those of you who use Adobe Photoshop, this article isn’t for you. For those who can’t afford Photoshop, read on.
Two simple things to remember: DPI is the metric related to print and PPI is the metric related to a computer screen. To make things even more confusing, they’ll be used interchangeably.
DPI vs PPI
DPI stands for dots per square inch. A 300 DPI image is considered to be a high quality photo for print. More dots = higher quality.
PPI stands for pixels per square inch, which are squares of light that fit into an inch on a monitor. A 72 PPI image isn’t appropriate for print because it will appear pixelated, like the right side of the image above. (Although you’re viewing this image on a computer screen, we wanted to demonstrate what a 72 PPI image might look like when printed.)
DPI For Print
First and foremost, when preparing a layout, you’ll need to know the finished size of your image, in inches. In addition, you’ll have to confirm that it’s at 300 DPI.
These days images shot with a smartphone are usually high resolution, large in size, and normally don’t pose a problem for your print project. However, there’s a high likelihood that downloading an image from the internet won’t meet the 300 DPI criteria for print.
Here’s a quick chart of image resolution as it relates to a finished printed image size, in inches, at 300 DPI.
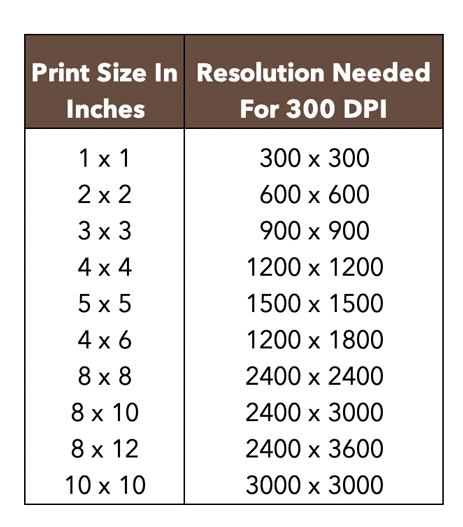
Per the chart above, a 5” x 5” image has to have a resolution of 1500 x 1500 to be suitable for print. If the resolution is higher or lower, you’ll have to make some decisions.
If your resolution is 3000 x 3000 and the size is 5″ x 5″, you can resize it to 1500 x 1500. This would reduce the overall file size, which could be an advantage if you’re sending it via email. Alternatively if your image is 5″ x 5″ and the resolution is at 1200 x 1200, your DPI is too low. You’ll either have to change your layout to accommodate a smaller 4” x 4” image size, to meet the 300 DPI criteria, or use another image.
The chart above assumes a square image. If it’s not a square and you have a 1920 x 1080 image, divide by 300 to get the size, i.e. 1920/300 = 6.4 inches and 1080/300 = 3.6″. Your final image size would be 6.4″ x 3.6″.
Here’s how to find the DPI for print:
Download GIMP. GIMP is a free open source tool that enables you to edit images. For those of you who can’t afford Photoshop, it’s a great alternative solution.
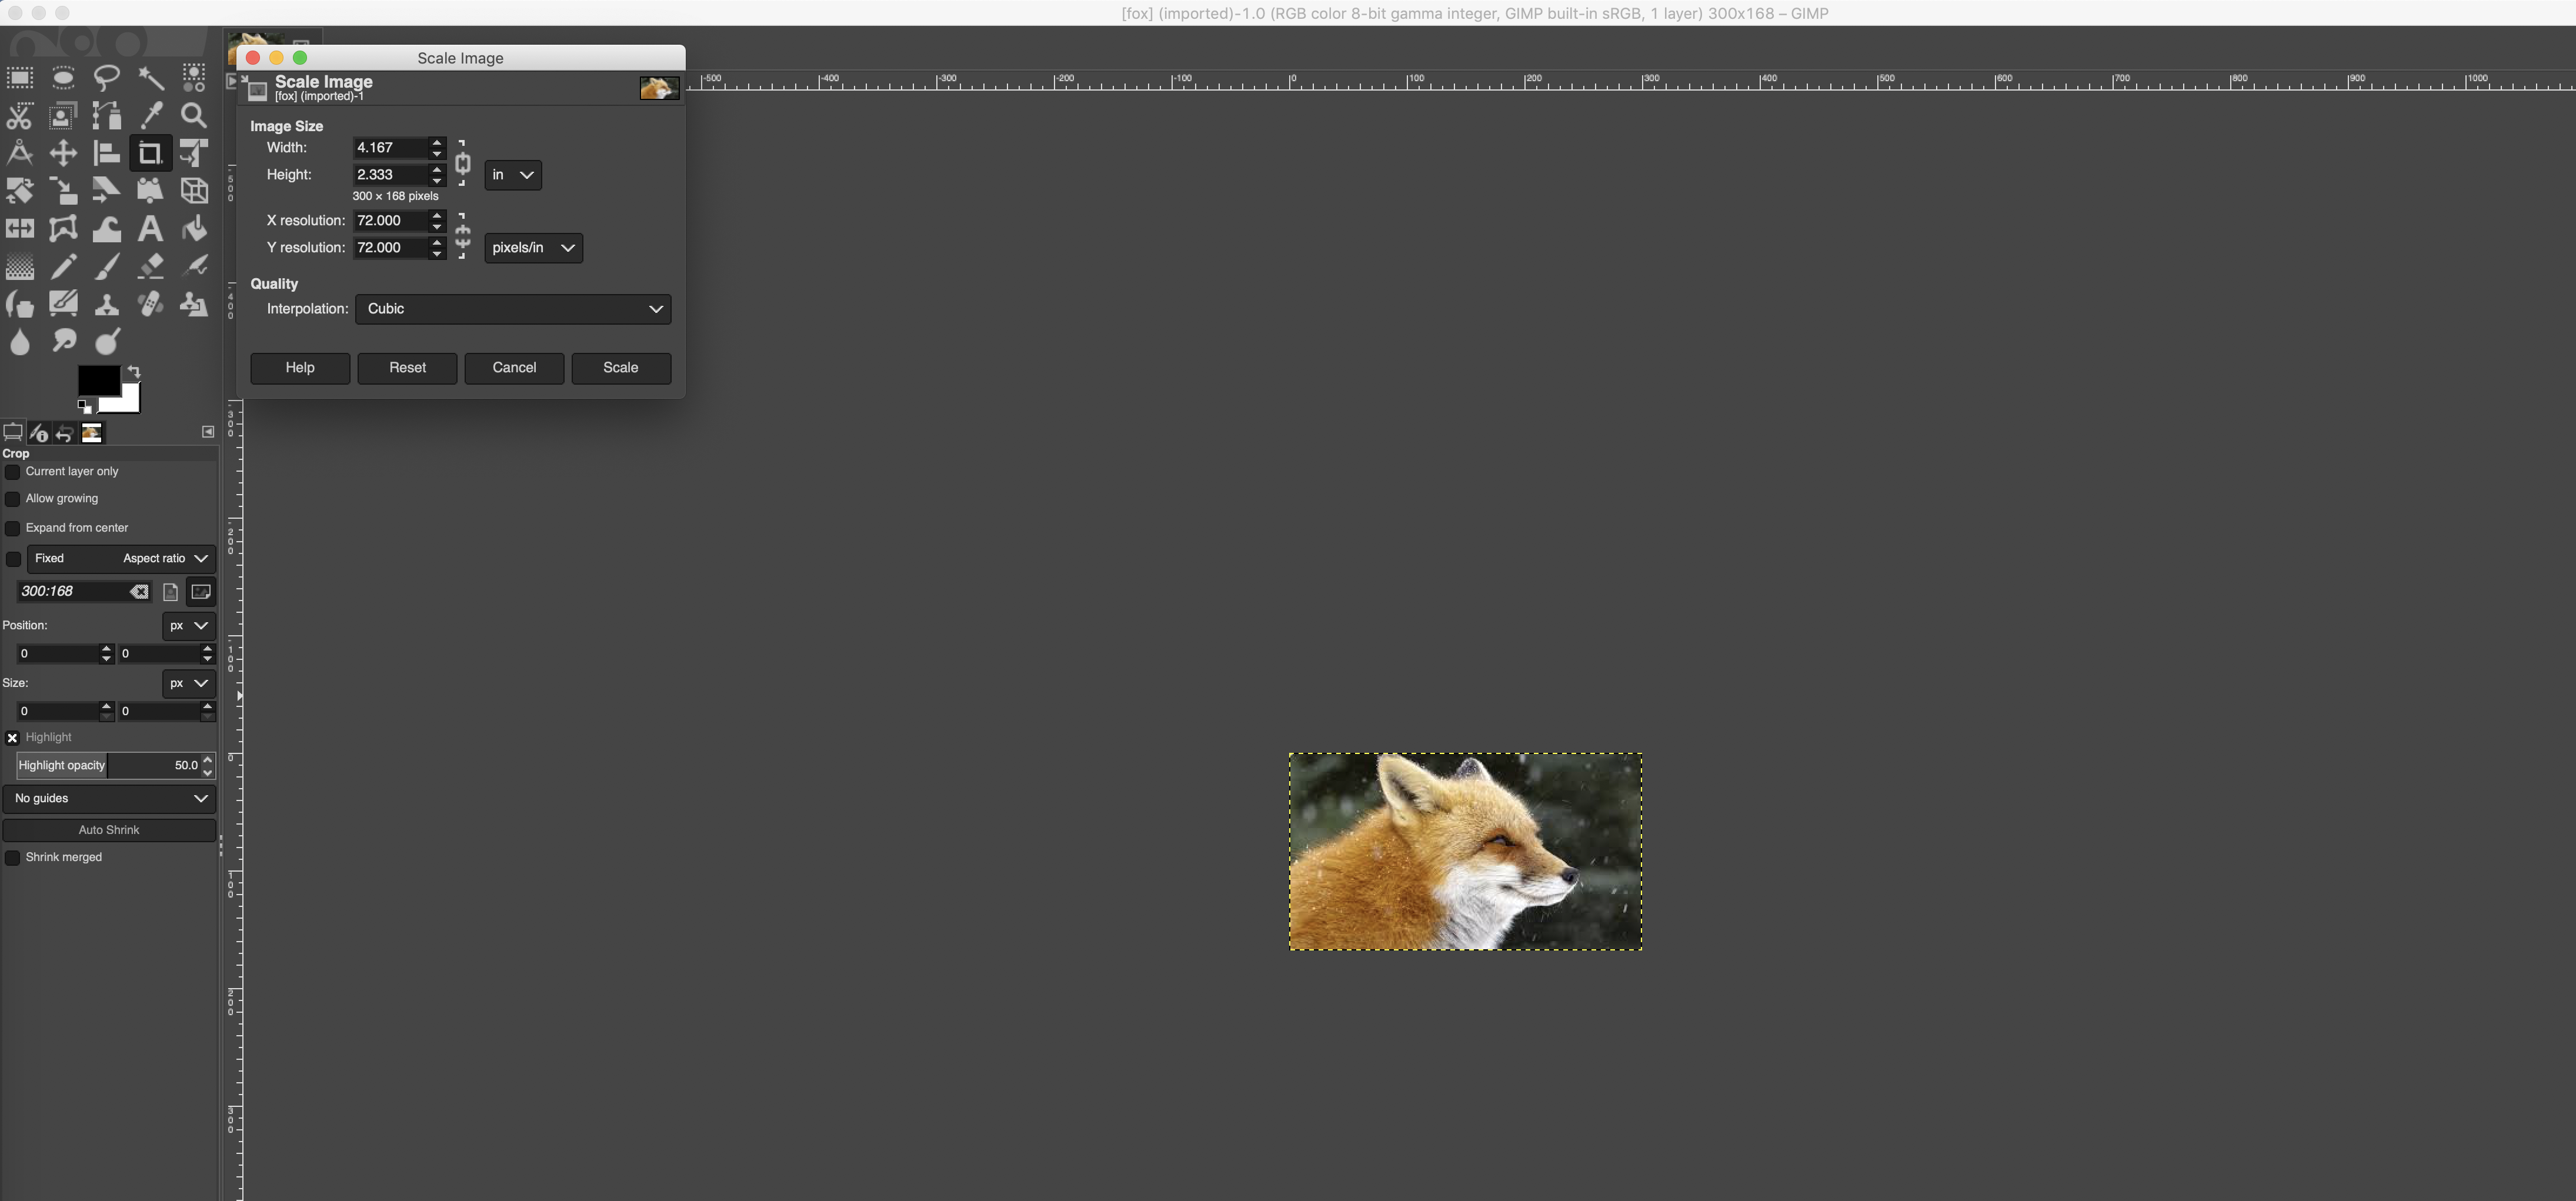
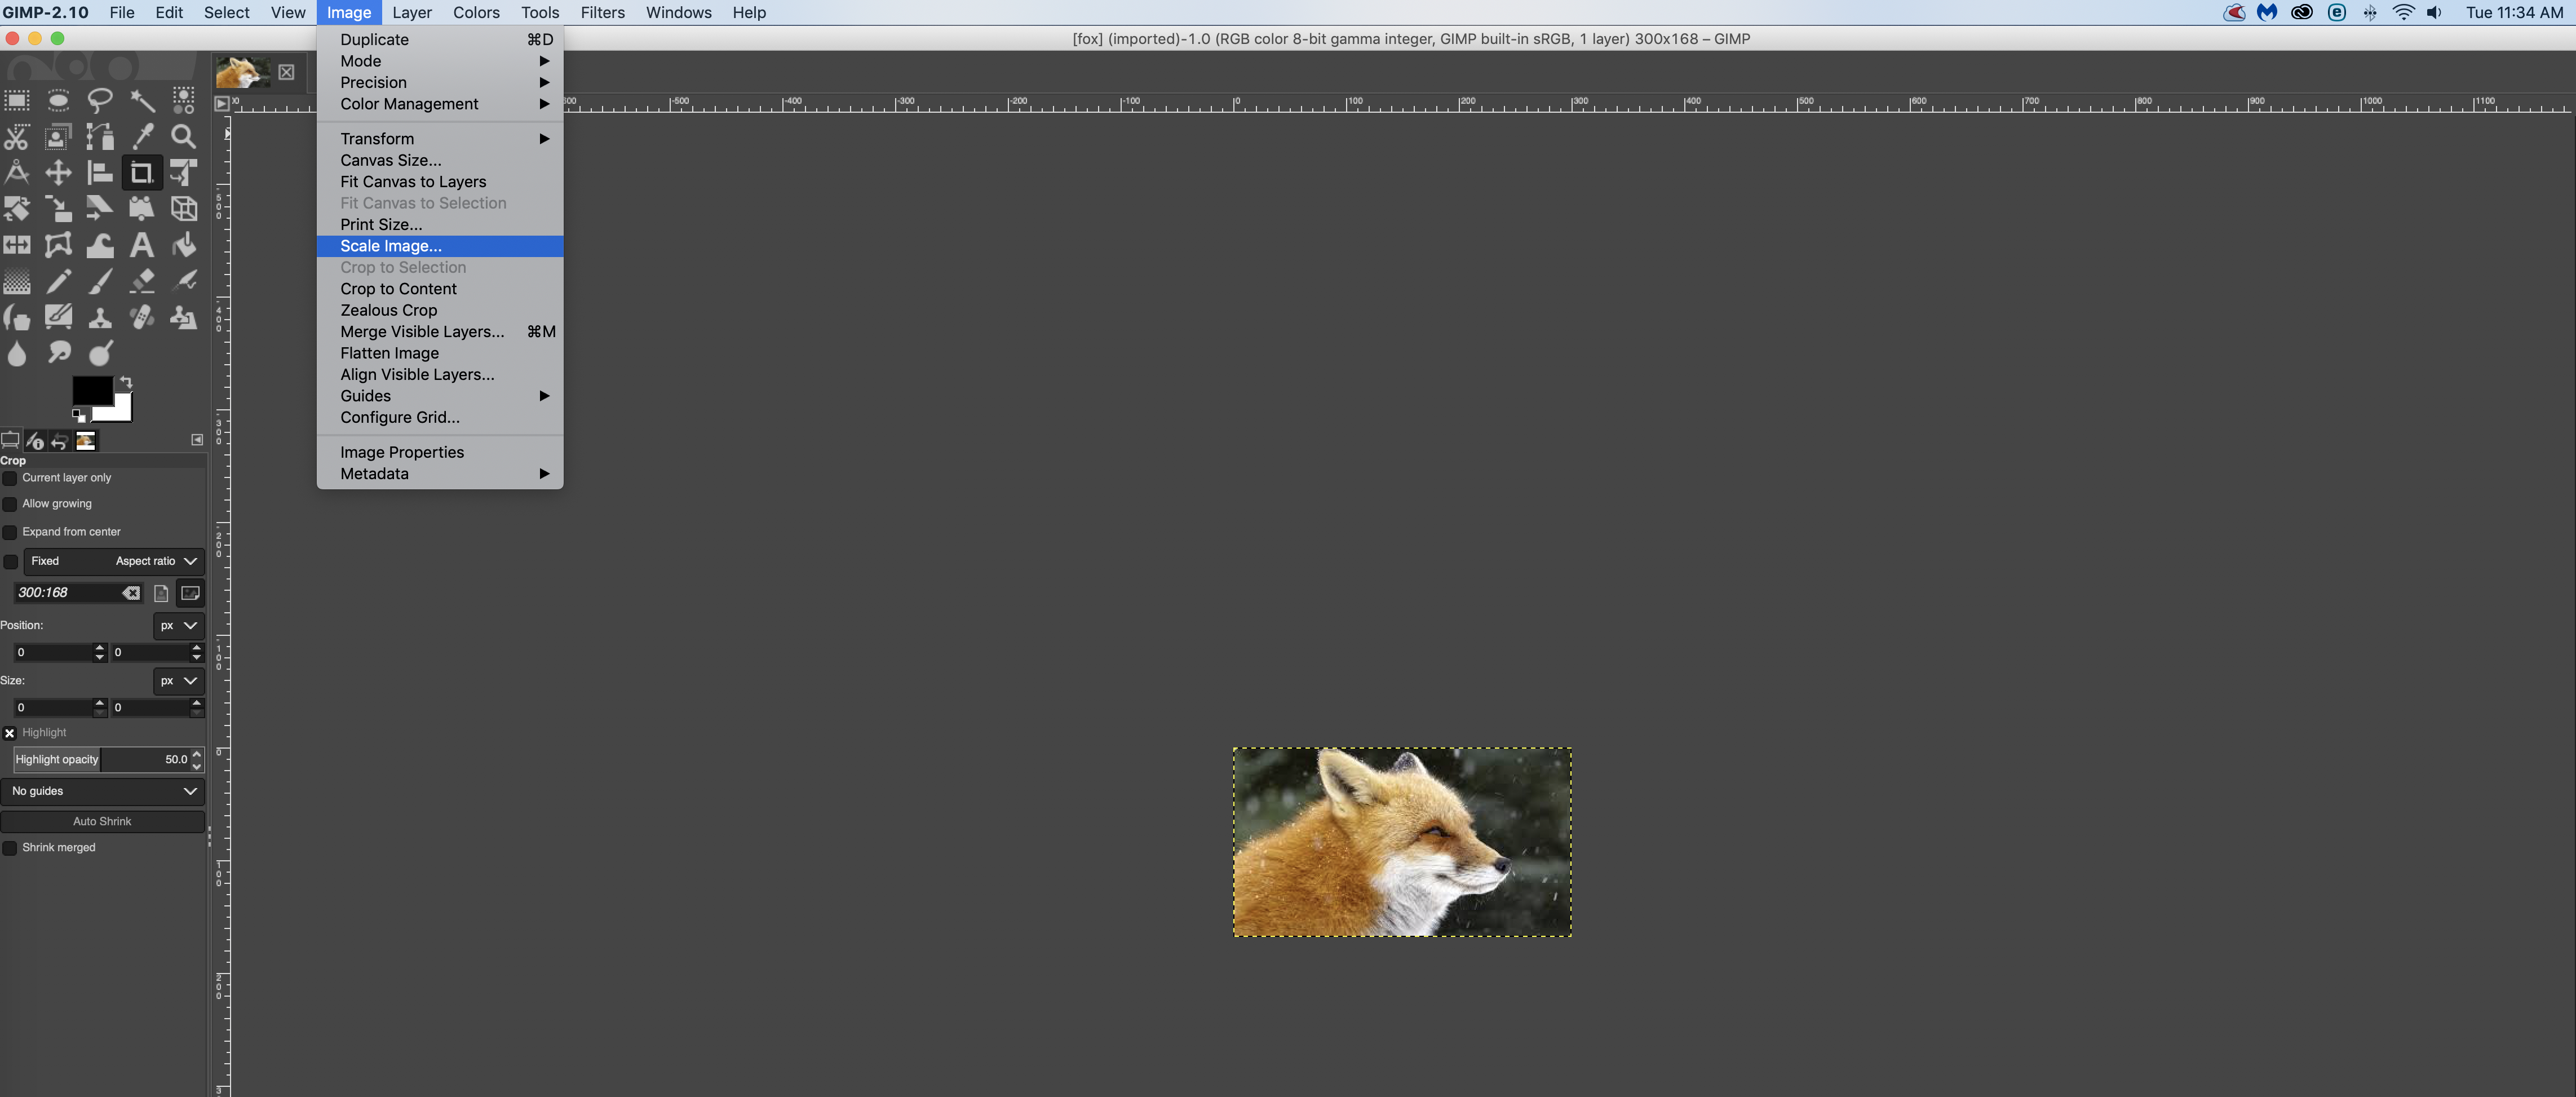
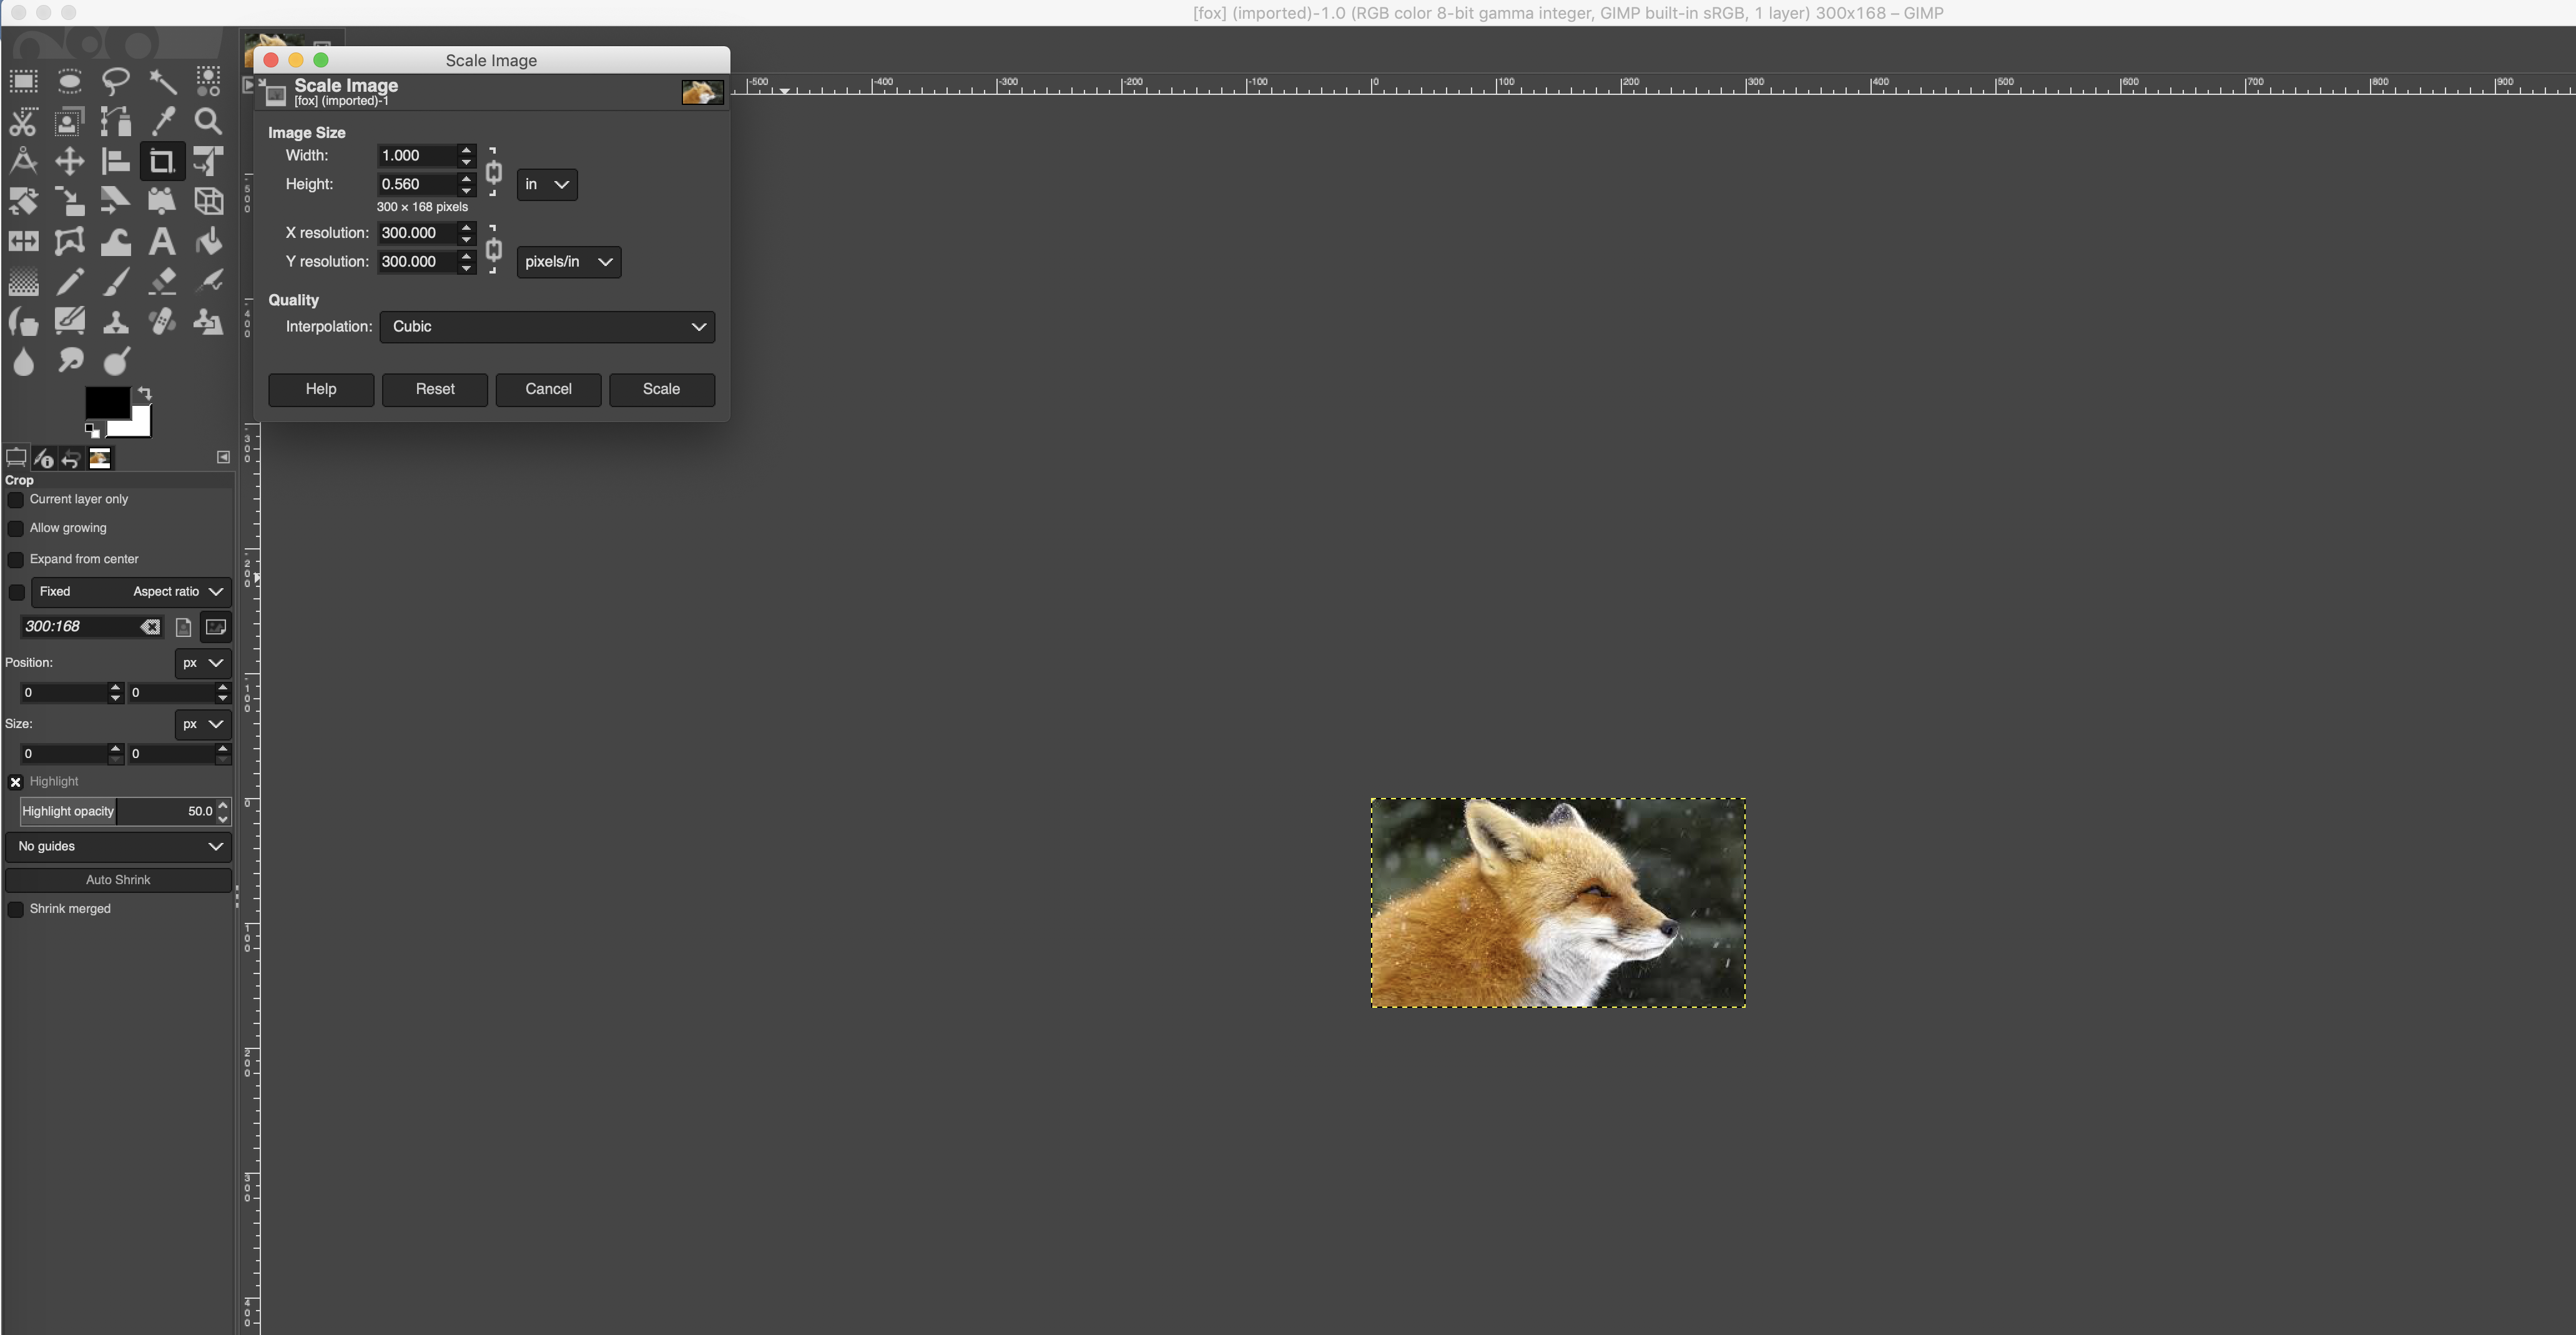
Open your image in GIMP. Then go to > Image > Scale Image. Another dialog box will appear with a drop down option for image size. The option at the top gives you the image size. Select “in” (inches) from the dropdown.
The second set of metrics gives you the DPI/PPI. Notice that 300 PPI is shown in the X resolution & Y resolution boxes. In this case, GIMP isn’t calling it DPI and doesn’t distinguish between the two. Also don’t get hung up on the fact that the term resolution is being used with PPI. Just know when you view your image size in inches, the X & Y resolution needs to be 300 PPI.
In this example, the image size is only 1″ x .56″ and may be too small for a layout. The solution is NOT to scale the size up (in inches), but to get a larger image. If you scale the size up, your DPI will no longer be 300. Play with the numbers and see for yourself.
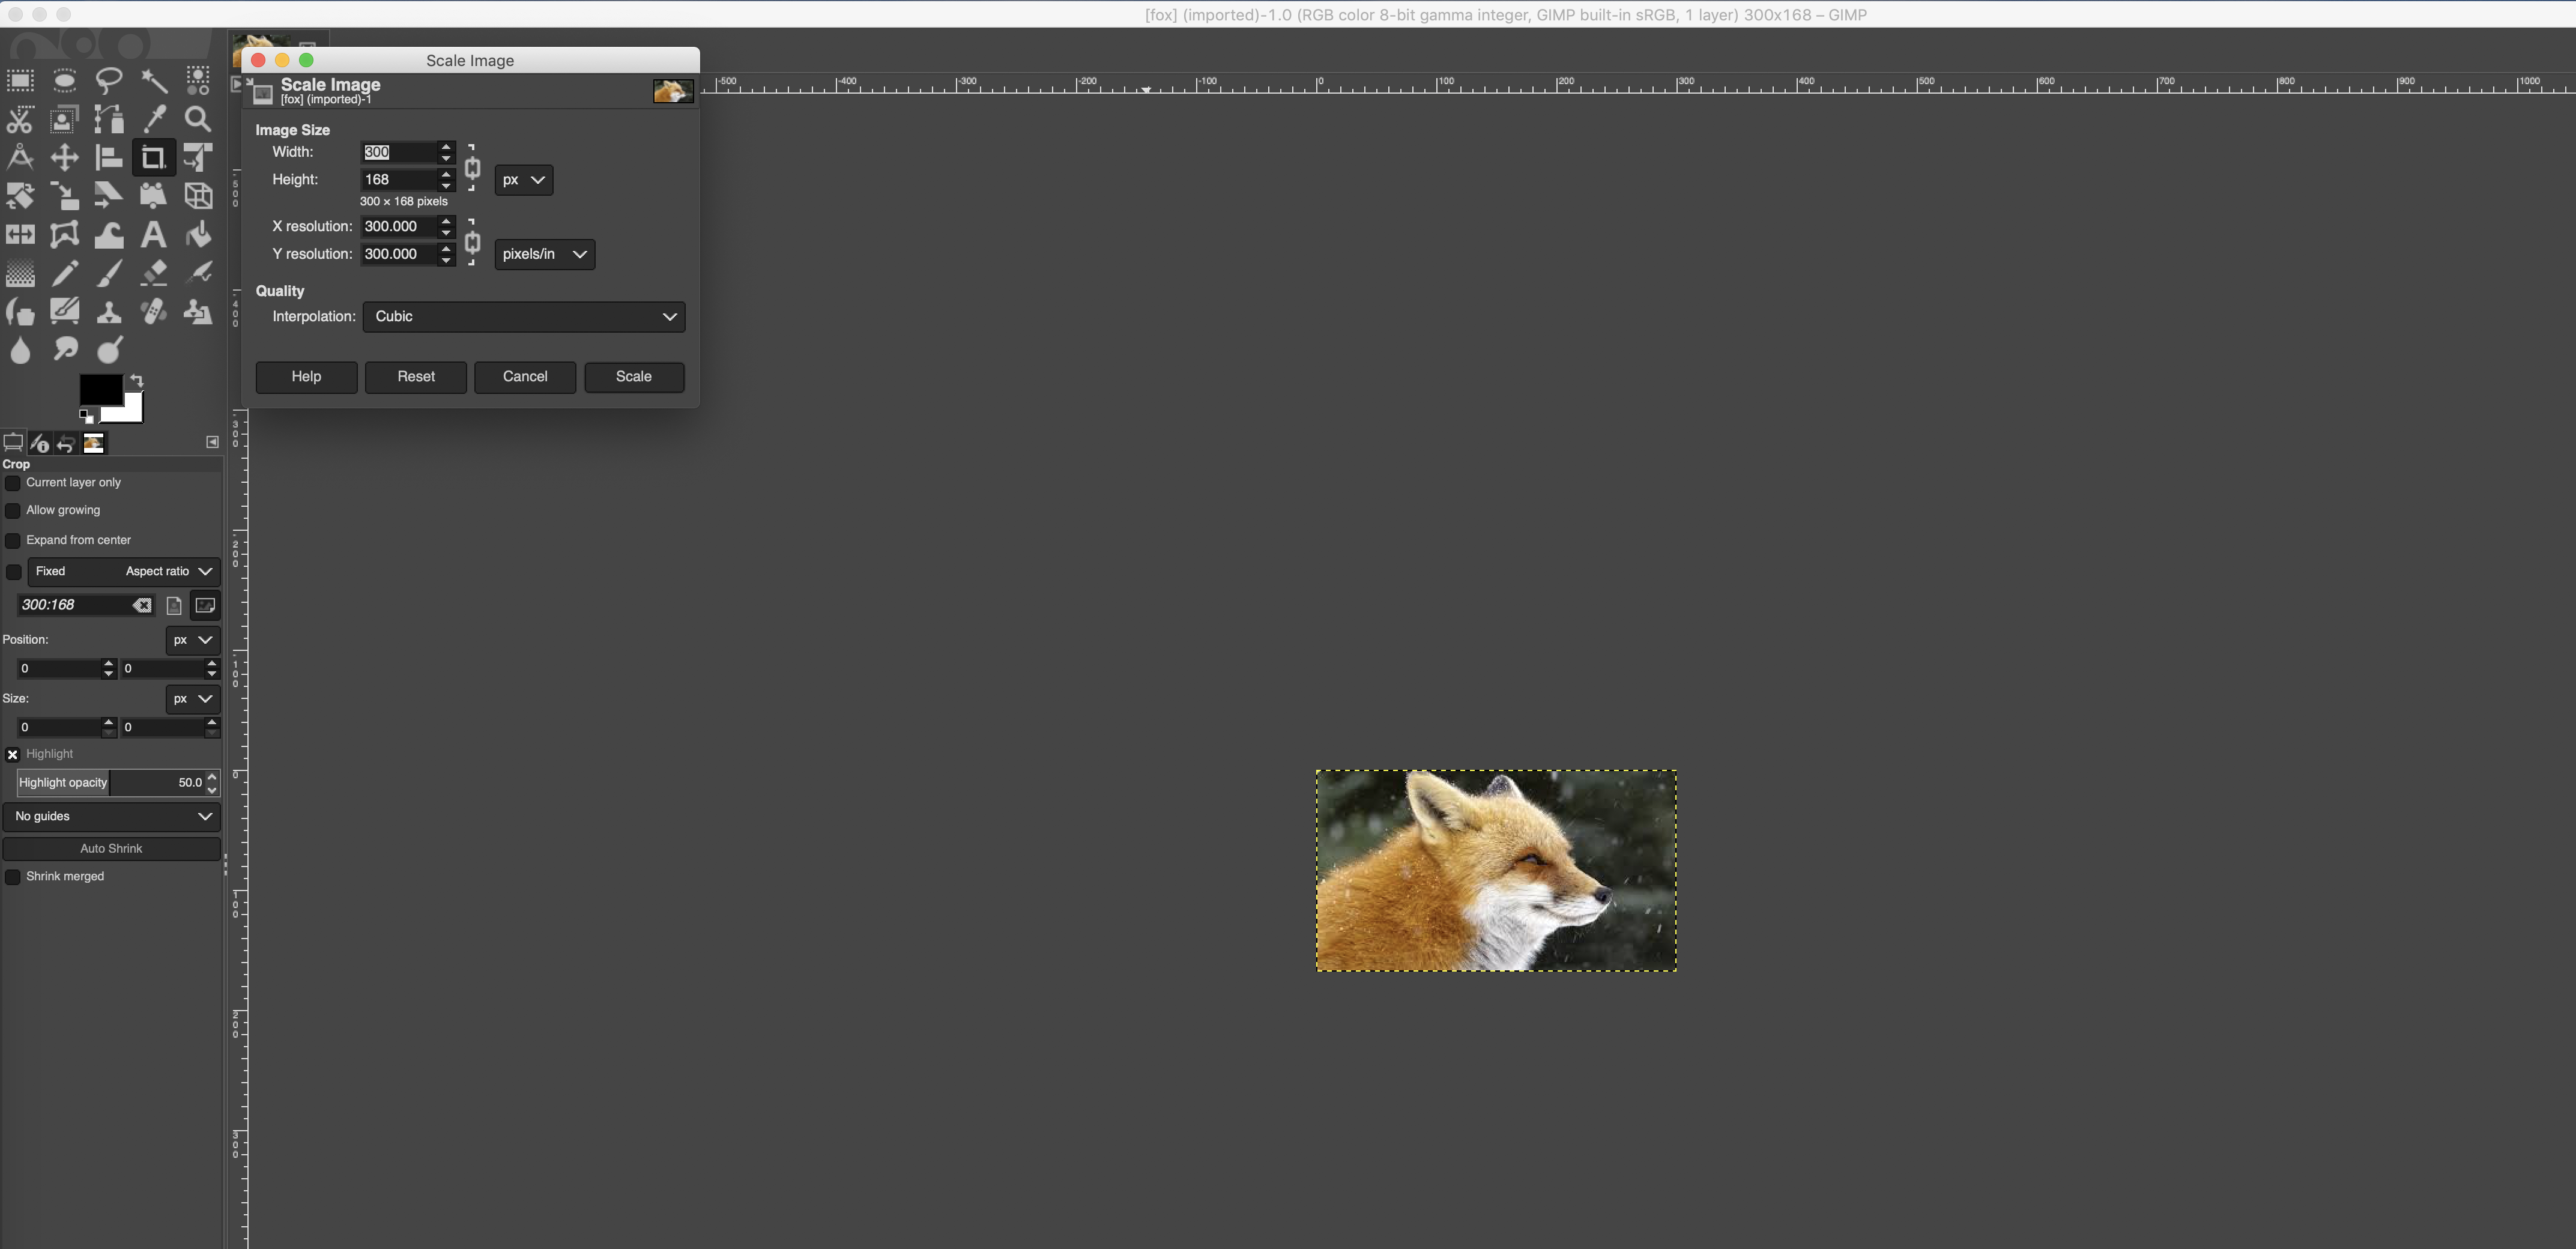
What happens when you change the PPI to 72?
If you change the PPI setting to 72.000 on both the X and Y resolution, you’ll notice that the size of your image increases. This may be the size (in inches) you want in your layout, but the DPI/PPI is not 300.
Remember when resizing images if your image is too small to begin with, changing a 72 PPI image to 300 PPI won’t make it the correct resolution for print. All you’re doing is putting empty pixels in the image, which will result in pixilation.
To learn more about how to use GIMP, go here: https://www.gimp.org/tutorials/
Also, there are plenty of tutorials on YouTube that will show you how to use the program.
Whether your print project is a brochure, direct mail piece, or a large format poster, a high quality image at 300 DPI is A MUST!
One final note, if you have a Mac and want to download GIMP, you’ll get a message stating that the program is not from the App Store or an identified developer. Go to System Preferences > General > unlock the lock using your password, and then click “Open The Program Anyway”.